
Adding a signature image to your email account allows you to consistently brand your email with your own logo, image profile, and contact information. Each email provider may have a slightly different interface for establishing and managing signatures; this article is focused on the GMAIL system specifically. We typically design image signatures at 72 dpi, within 600 px to 800 px width, and between 300 px and 400 px height.
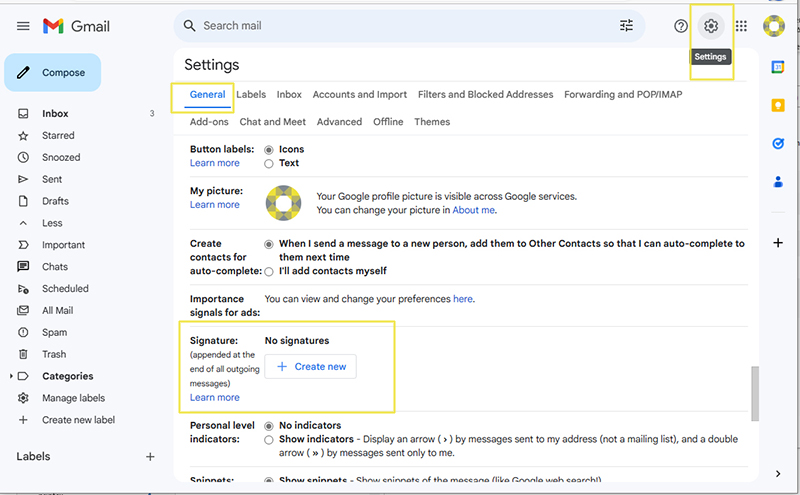
Access Your Account Settings
Gmail settings are accessed through the little gear icon in the upper right corner of your dashboard. You may have to click the “view all settings” link if you are not seeing a display with multiple tabs, with left most tab being General. This is where the signature tool is located.
Create a New Signature
Click on the “+ Create new” button in the signature tool. You will be prompted to name your signature.

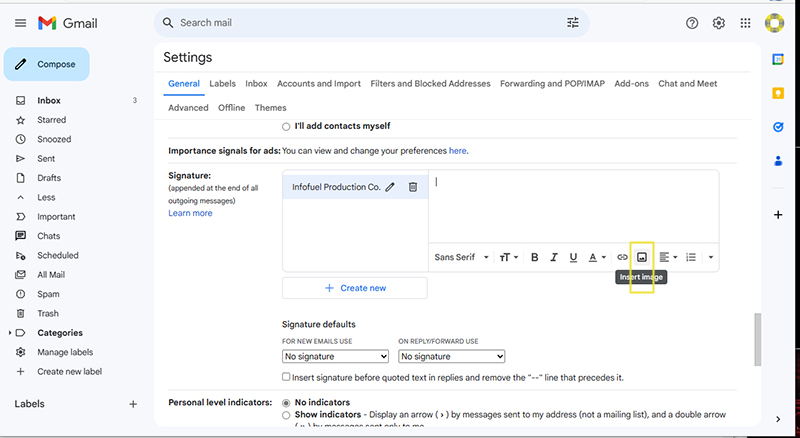
Insert Image
Click on the Insert Image icon in your text browser, then you will be prompted to upload the signature file image from your device or select from existing GMAIL files. If your image is constructed using the dimensions we recommend, use the full size option. This will ensure your image is sharp and clear.
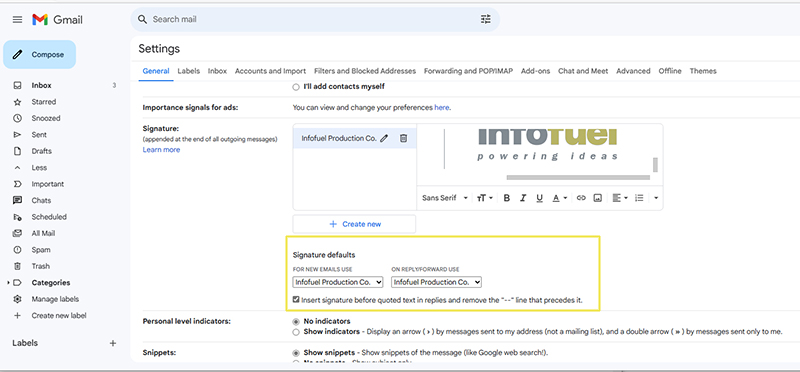
Set Signature Parameters
Select your newly created signature title from the drop down menu for new email and if desired, for reply and forwarding. If you are using a signature for replying and forwarding, we recommend checking the box to insert the signature before quoted text, as this will display your signature directly after what you have written.
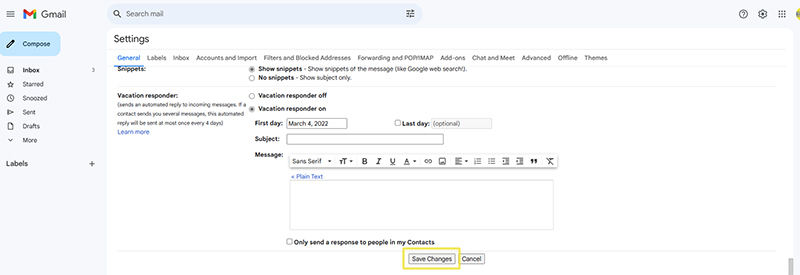
Save Your Changes
Don’t forget to scroll down to the bottom of the page and save your changes. Without this step you will lose all the work you have done so far.
Test Your Signature
Send yourself or your support person an email to test the signature displays correctly. You should see the signature IN the email as you are composing it.
